
- This topic has 15 replies, 5 voices, and was last updated 6 years, 8 months ago by
 Ragùneraxe.
-
RagùneraxeWarlord@necroaxeMember since: 25/11/2017


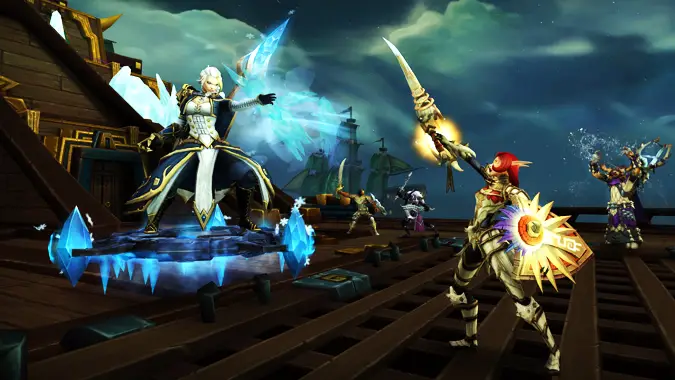
LADY JAINA PROUDMOOREPurely single-target fight with high spatial and ability awareness of the boss to overcome the encounter. Managing your Chilled Touch stacks and avoiding lots of the unnecessary damage that can be taken is key to defeating Jaina.
The fight consists of 3 Phases and 2 Intermissions. Jaina has an Enrage Timer of 15 minutes.
- Targets: Lady Jaina Proudmoore, Kul Tiran Marine, Ice Block, Jaina’s Tide Elemental, Wall of Ice.
- Played Faction: Horde.
- Main Mechanic: Chilling Touch – Stacking debuff that deals ticking damage and slows movement speed. Applied by being by Jaina’s various Frost abilities. At 20 stacks and hitting 80%, the player will be blocked in ice, which will have to be killed to free them. You must use different sources of warmth throughout the fight to remove these stacks.
Phase 1
The fight begins on board the Zandalari flagship against Jaina and 2 Marines. You must fight Jaina, remove her adds from the fight as quickly as possible and push back the Kul Tiran Corsairs that will try and bombard your flagship from the ocean.
Lady Jaina Proudmoore
- Ice Shard: Main ability casted on the tanks as opposed to melee attacks. Deals Physical damage, applies Chilling Touch. Switch when Chilling Touch stacks go too high.
- Avalanche: Targets the tank with large chasing blue swirlies that impact ice into the floor. The impacting ice can clear patches of fire from the ship, and also quench burning Ballistas. Move out and avoid the swirlies, while clearing as much fire as possible – leave atleast 1 patch of fire up at all times to clear Chilling Touch stacks.
- Grasp of Frost: Roots random players. This debuff lasts 8 seconds and applies Chilling Touch every 2 seconds. Dispell this ASAP on all targets affected.
- Freezing Blast: Charges up a large frost rune in a random direction and fires a shockwave of ice, dealing moderate Frost damage and knocking back. Avoid this or you risk falling off the ship.
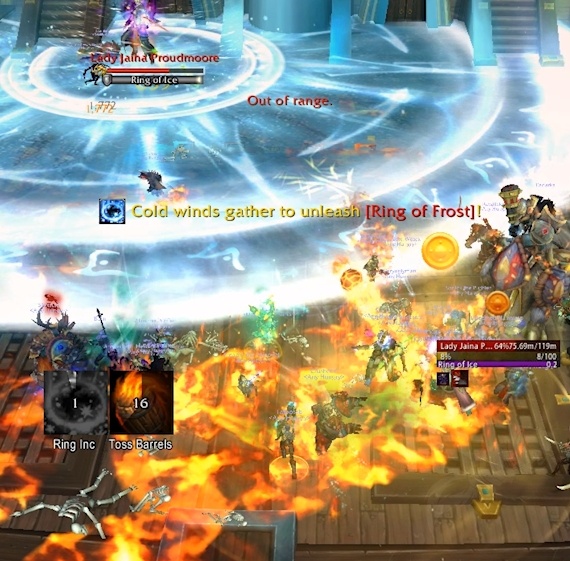
- Ring of Ice: Periodically will channel a massive frost circle around her, covering most of the ship. Once the cast is finished, anyone caught in the ice will be placed in an Ice Block until they are freed, anyone outside of the ice will be rooted by Grasp of Frost. Run all the way out of the ice and move into a patch of fire before the Ring explodes to remove the root.
Kul Tiran Fleet
- Kul Tiran Corsair: A Kul Tiran ship will periodically approach your ship on the right or left side. The Corsair will bombard the deck of the Zandalari ship, leaving patches of fire in the orange zones on the deck of the ship.
 The only way to remove the Corsair and stop the bombardment is by utilizing the Ballistas on the Zandalari vessel.
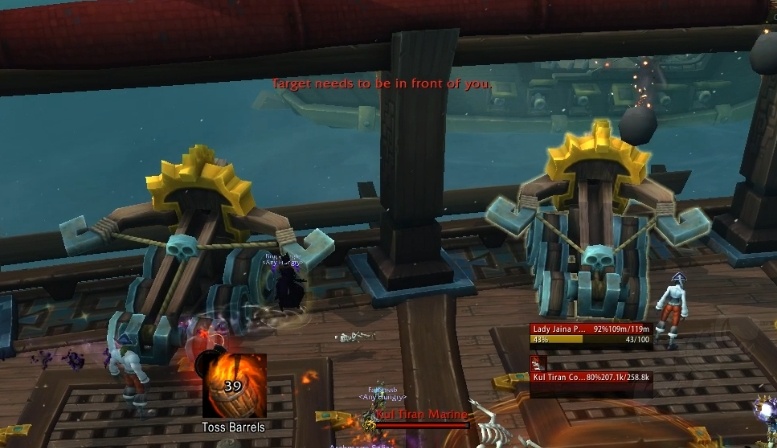
- Ballista: There are 3 Ballistas positioned on right and left sides of the ship. They are interactable by any player, and will fire a bolt at any nearby Kul Tiran ships. Use the Ballistas on the appropriate side that is being bombarded 6 times to remove the Kul Tiran ship from the fight.
- Kul Tiran Marine: 2 Marines will fly in and land on the deck of the ship when a Corsair moves into position. The Marines will try to sabotage the ship by dropping Charges on the deck and fixate on random players. These charges must be picked up and brought to the edge of the ship and thrown off to avoid blowing up on the ship and leaving fire. Kill the Marines a priority – Priests can Mind Control and force them to jump off the ship.
Intermission 1
At 60%, Jaina will disappear from the ship and teleport to the middle of the ocean. She will freeze the ocean, halting all of the ships and creating a Frozen Landmass to fight on. The intermission ends once Jaina’s Howling Winds cast is interrupted and the deadly fog subsides.
- Howling Winds: Jaina teleports to a random location on the frozen island and channels a massive Blizzard, restricting all vision of the encounter area. She will radiate Glacial Shards out from her location in a spiral pattern. You must stick together as a group and find Jaina in the fog as quickly as possible.
- Glacial Shard: Orbs of ice that will slowly rotate around the room emanating from Jaina’s position. If a player is hit by a Glacial Shard, they take low damage and are trapped in an Ice Block. Avoid these orbs at all costs to avoid being trapped in an Ice Block and left behind.
- Blistering Tornado: Jaina’s storm spawns patrolling tornadoes across the frozen island that move in a predictable back and forth pattern. If a player is hit, they take massive damage and are knocked back. Avoid these like the plague.
Phase 2
Phase 2 begins once Jaina’s Howling Winds has been interrupted. She gains a series of new abilities that will all be new sources of Chilling Touch stacks and require a keen eye and quick reactions to avoid.
Jaina Proudmoore
- Ice Shard will return from Phase 1
 Avalanche will return from Phase 1, but it will now leave behind patches of deadly ice on the ground. Each time an Avalanche lands, it will spawn Hand of Frost waves emanating from the landing point.
- Hand of Frost: Slow moving waves of ice that will damage and root anyone hit by them. Avoid them or you will gain Grasp of Frost and be rooted.
- Ring of Ice has been removed from the rest of the encounter.
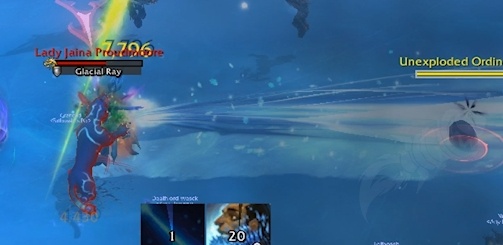 Glacial Ray: A thin beam will be channeled directly infront of Jaina, in a random direction. The beam deals massive ticking damage to anyone standing in it and applies many stacks of Chilling Touch. Avoid this or you will get Ice Blocked very quickly.
- Icefall: Jaina spawns a massive reticle on the encounter floor at one of the outer walls of the arena. The reticle will be the indicator where the falling ice shower will begin, and the light blue indicates the direction in which the ice will fall across the encounter room. Position yourself to avoid the shower completely.
Proudmoore Flagship
Jaina’s ship will fly above and rain down arcane spells onto the raid. It is important to avoid the raid with these abilities, and in certain situations aim them at Unexploded Ordnance found around the encounter area.
- Broadside: Targets 3 players with a 10yard arcane circle around them and a moderate DoT. You must run out and avoid people with this ability, and when necessary you must drop the Broadside onto Unexploded Ordnance.
- Unexploded
Ordnance: 4 attackable charges will be scattered across the encounter room. These charges
are embedded with Refractive Ice, and will take 99% reduced damage unless the buff is removed. The Refractive Ice buff can only be removed by dropping Broadside onto the Ordnance itself. Once the buff is gone, the Ordnance can be killed to ignite it and grant warmth to the raid so they can clear stacks of Chilling Touch. THESE ORDNANCES ARE LIMITED AND THE ONLY WAY TO CLEAR STACKS IN THIS PHASE.
- Unexploded
- Siegebreaker Blast: Targets 1 random player with a massive arcane circle. This ability must be moved out as far as possible from the raid. It DOES NOT break Ordnance’s Refractive Ice, and its damage is raid-wide and reduced by distance.
Intermission 2
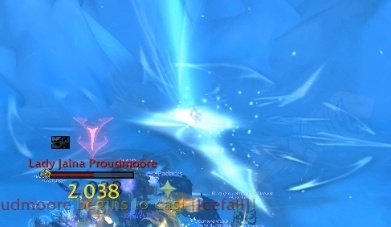
The second intermission will begin once Jaina hits 30% health. She will teleport to the middle of the frozen island and begin channeling Flash Freeze. In this phase, she becomes immune to all damage and channels this deadly spell until it is interrupted by freeing Nathanos from his Ice Block.
- Flash Freeze: Jaina slowly fills the entire island with deadly ice emanating from her position. Anyone caught in the ice will be instantly Ice Blocked. Avoid Jaina and run away from her ASAP, positioning yourself to the back wall.
- Wall of Ice: In this phase, the back wall of the encounter will become attackable and killable. You must destroy this wall section to increase your distance from Jaina and to reach Nathanos and kill Jaina’s Tide Elemental.
- Jaina’s Tide Elemental: Once the Wall is down, you must kill this add as soon as Nathanos’ Ice Block has been broken. Run away from it once it hits 100 Energy to avoid getting hit by Frost Nova.
Once Nathanos has been freed, he will interrupt Jaina’s Flash Freeze. Jaina will teleport to the far end of the room and begin channeling Arcane Volley instead, raining arcane missiles down on the ground. Avoid these.
The intermission ends once Jaina’s Arcane Volley has been interrupted, which must only happen once the raid is in position.
Phase 3
The final phase of the encounter. She retains all of her abilities from Phase 3, but adds new ones to deal with on top of the pre-existing ones. The Flagship will also continue to bombard the raid, but there are no longer any Ordnance left to clear Chilling Touch. This phase is a race against time, aiming to defeat Jaina before she freezes the entire raid with increasing stacks.
The fight ends at 5% health, at which Jaina will shield herself and escape from the encounter.
- Crystalline Dust: Periodically launches of burst of ice in a frontal cone. Deals high damage and applies Chilling Touch. Face her away and never be infront of her.
- Shattering Lance: Spawns a large spike of ice whenever a player becomes Ice Blocked. After a few seconds, the Lance is shoot across the encounter area in a straight line from where it’s facing, dealing low damage and applying Chilling Touch. If you are hit by Shattering Lance while Ice Blocked, the damage you take is tripled. Break Ice Blocks ASAP and avoid these.
- Prismatic Image: Jaina will periodically spawn an Arcane Copy of herself that copies her major abilities each time she casts them (Icefall, Glacial Ray, Crystalline Dust). Focus this add down and kill it ASAP, while avoiding any duplicate abilities that may be casted.
-
RagùneraxeWarlord@necroaxeMember since: 25/11/2017
HEROIC DIFFICULTY
Phase 1
- New Functionality – Ice Shard: Applies an additional debuff that increases damage taken from subsequent Ice Shards by 10% per stack. This means more frequent tank swaps.
- Avalanche now targets 3 random players, up from 1 (tank only) on Normal difficulty.
- Time Warp: At 70% she casts Time Warp on herself and all adds present. Grants 30% for 40 seconds and causes her spells to happen much faster, especially Ring of Ice. Be prepared to react quicker during this Warp.
- Bombard: The orange zones fired from the Corsair will now also knock you back if you are hit.
- Set Charge: Charges dropped by Marines will now explode after 15 seconds, down from 40 on Normal.
Intermission 1
- Jaina will now teleport to a random location in the fog and begin channeling. This is a change from Normal in which her position in the fog is fixed. You will need a Hunter or a Druid to Track Humanoids to find her in the fog quickly.
Phase 2
- There are only 3 Unexploded Ordnance to utilize in this phase, down from 4 on Normal difficulty.
Intermission 2
- Jaina’s Tide Elemental now casts Water Bolt Volley. It is an interruptible cast that will deal raid-wide damage if not stopped. An interrupt rotation must be assigned to deal with this ability.
Phase 3
- New Ability – Orb of Frost: Jaina will target a player and place a circle at their position and fire a large frozen orb in the direction chosen. When the orb hits the end of its path, it will explode for raid-wide damage and apply Chilling Touch stacks to the entire raid. The damage and the stacks gained can be reduced by moving in to soak the orb while it moves to its target. People will be assigned to move in and intercept the orb to absorb and shrink it down – immunities also work.
MYTHIC DIFFICULTY
- New Ability – Gathering Blizzard: Jaina charges a Gathering Blizzard (displayed by an additional power bar) for the entire fight. This bar gains energy on a set timer from 0 to 100.
- 0-49 Energy: If there are no players within 10 yards of you, you will gain the Freezing Blood debuff which will freeze you in an Ice Block after 6 seconds if you do not stack on someone.
- 50-74 Energy: You need to be within 10 yards of 3 players to avoid getting Freezing Blood.
- 75-99 Energy: You need to be within 10 yards of 5 players to avoid getting Freezing Blood.
- 100 Energy: Jaina summons a vision obscuring fog similar to 1st Intermission. In addition, you still need to stay within 10 yards of 5 players to avoid Freezing Blood.
Phase 1
- New Ability – Frozen Siege: Jaina will incase the nearest Ballista in ice. You will need to DPS the ballista to break it free for use but only if it is on a side that is being bombarded by a Kul Tiran Ship.
Intermission 1
- Jaina now spawns in a set location of the arena and spawns 5 Icebound Image adds that will channel her Howling Winds ability and spawn orbs of their own.
- Jaina cannot be interrupted until all Images are dead.
Intermission 2
- Upon dying, Jaina’s Tide Elemental will split and spawn 2 new Jaina’s Tide Elemental adds with less health.
- Do not interrupt Arcane Barrage until all Chilling Touch stacks have expired.
-
RagùneraxeWarlord@necroaxeMember since: 25/11/2017
NORMAL / HEROIC GUIDES
MYTHIC GUIDE
-
PokoFormer Member@pokoMember since: 21/12/2017


I was watching the fatboss guide for Jaina and their strategy for the last 15% where we are getting the iceblocks made the most sense.
They picked a group of ppl with good aoe and made them get the stacks first just like we did.
Then when the rest of the ppl get iceblocked they pop bloodlust to free them faster.
Since bloodlust forces Jaina to go into iceblock herself we won’t have any of her casts to worry about except ice lances.
I think we should try bloodlusting at that point next week and i am pretty sure we will kill her
-
 ScabbroxWarlord@scabbroxMember since: 05/11/2017


I was watching the fatboss guide for Jaina and their strategy for the last 15% where we are getting the iceblocks made the most sense. They picked a group of ppl with good aoe and made them get the stacks first just like we did. Then when the rest of the ppl get iceblocked they pop bloodlust to free them faster. Since bloodlust forces Jaina to go into iceblock herself we won’t have any of her casts to worry about except ice lances. I think we should try bloodlusting at that point next week and i am pretty sure we will kill her
This is partly right and partly wrong.
As Voss posted in the Discord Encounter channel Sunday evening, the actual suggested strategy is different. The AOE team don’t soak the first orb, everyone else does.
See below the extract Voss linked from Competitive WoW:
This is from the competitivewow subreddit and is a way to handle p3 for jaina
“We have maybe 5 players spec’d for mongoloid AoE. We have everyone except the mongoloids soak the first orb to get high stacks. Once she casts her first Glacial Ray, we pop Hero. After the cast ends and leaves the frost patch on the ground, the non-mongoloids all stand in the frost patch to get ice blocked. The mongoloids then use Hero and all their AoE CDs to break the raid out of the ice blocks. We then nuke down the mirror image and by that time we’re back on Jaina. At this point, the mongoloids and tanks will be the only ice blocks for the remainder of the fight. Burn the boss to 5% and collect loot.”
As for the orb, you probably only get 0-1 more depending on DPS. You can just have somebody solo that orb with an immunity or something”
-
PokoFormer Member@pokoMember since: 21/12/2017
From UH DK pov which is one of the most retarded aoe specs in game atm you need to spec and gear for it specificaly and that cripples boss dmg.
If thats the case with other specs too then i am not sure its worth sacrificing 5 dps for it
-
 VossaneFormer Member@wurmiMember since: 06/01/2018
Thankfully not every specc good in AoE has that Problem. Sure they all thake a hit in ST but it is not that bad if you get a clean ice block Phase and free damage on the Image. Also I don’t think you really need “monogloid AoE” and 5 good AoE classes would be enough togheter with BL.
-
ScabbroxWarlord@scabbroxMember since: 05/11/2017
Some classes don’t need to sacrifice a lot of ST to do better aoe, it’s just usually a change of secondary stat focus.
Arms for example is poor at ST currently no matter what you do. It is however capable of seriously ‘mongoloid’ aoe if you stack the right stats and gear and hold your CDs for the aoe and ST remains just a tad worse.
Overall this isn’t a dps check fight, once we’re past the first two phases, holding CDs to free the 13 healers and dps that aren’t running aoe spec is all that is needed to ensure that you push past the real bottleneck which is the iceblocking of the raid.
If that means using a 3 minute CD on iceblock and not Jaina then that’s a fair trade.
The main issue will however be to stop the usual suspects that are very poor with where they put their feet from screwing up the strat by getting themselves blocked at the wrong time.
Can’t have any of the mongoloids get blocked at the same time, nor can we afford to have people that should be getting blocked failing to get the stacks from orb soaking or standing in the lance ability rather that the ice patch and so taking damage and dying in the ice.
Will need some balancing no doubt, but certainly better than the mess we had last week when we hit P3.
-
RagùneraxeWarlord@necroaxeMember since: 25/11/2017
This weekend, to rectify on problems we encountered during progress last week, we have come up with 2 separate approaches which we will try to see if we can improve and push towards a kill.
- Mongo AoE: We spec 4-5 players into full AoE/Cleave builds. Fight is done as normal. At the end of the 1st Glacial Ray, we will use Bloodlust and the entire raid except for these 4-5 will ice block themselves stacked in the Glacial Ray’s ice patches. The 4-5 players will freely AoE and burn down the blocks under lust and free the raid, then switch to the Prismatic Image. You can find the strategy to do this at 7:00 minutes on this video:
- Ranged Burn Jaina: This strategy involves squeezing out as much damage onto Jaina during the Ice Wall intermission under BL. All ranged burn Jaina, all melee destroy the wall. Pushing out this damage into her will allow last phase to be shorter and reduce the risk of everyone being frozen in ice blocks.
We will be attempting both these strategies and approaches to the fight and see which one suits our composition and raid team best. Opting to try the Ranged Burn Jaina strat first as it the one with the least changes to approach from last week. If that doesn’t work, we will opt for the more different iceblock approach.
Thanks and see you in the raid. Be prepared for Curve!
- Mongo AoE: We spec 4-5 players into full AoE/Cleave builds. Fight is done as normal. At the end of the 1st Glacial Ray, we will use Bloodlust and the entire raid except for these 4-5 will ice block themselves stacked in the Glacial Ray’s ice patches. The 4-5 players will freely AoE and burn down the blocks under lust and free the raid, then switch to the Prismatic Image. You can find the strategy to do this at 7:00 minutes on this video:
-
KhermineyFormer Member@rasmushoegberg-netMember since: 16/02/2018

I downed Jaina in a pug after 4-5 tries using the “mongo” aoe strat, was a really clean kill, and it’s not hard to execute. As for AoE damage, frost mages use the same talents for pure single target and burst aoe, also we can completely ignore 2 iceblocks.
These strats can also overlap slightly, as in ranged can dps jaina without BL, our dps was more than needed the wall last week.
-
ScabbroxWarlord@scabbroxMember since: 05/11/2017
I downed Jaina in a pug after 4-5 tries using the “mongo” aoe strat, was a really clean kill, and it’s not hard to execute. As for AoE damage, frost mages use the same talents for pure single target and burst aoe, also we can completely ignore 2 iceblocks. These strats can also overlap slightly, as in ranged can dps jaina without BL, our dps was more than needed the wall last week.
That’s a fair point Kherm, we could indeed do the same if we have to. That being said, if we have the damage to push it before 100 seconds (when the entire raid freezes from ticking stacks) then we won’t need to AOE it and can simply have one person solo and immune the orb we get.
If that doesn’t work, or if as expected people still manage to pick up stacks from standing in things they should avoid and we have enough melee damage on the wall we could combine the two but we’d need to be sure that we could still handle breaking the raid out with Jaina lose and casting and not under iceblock as should be the case as if we move Bloodlust from the wall phase then chances are we won’t make the wall in time.
-
RagùneraxeWarlord@necroaxeMember since: 25/11/2017
Now that we’re well underway with Jaina Progression for the foreseeable future, I have finally updated this thread to include the Mythic changes of the fight.
In addition, here’s a few things we will be employing this weekend as we push f0r Phase 2 practice. So long as we can get Phase 2 down and learned this weekend, we have a very good chance at killing Jaina before Cutting Edge is removed.
The goal right now is clear. We have the time and the resources at our disposal to do it, and this would be our first Cutting Edge since Emerald Nightmare – the only one Weekend Warriors has ever gotten.
It would be nice to get this achievement now that the chance is in our favour. We just need to push for it a little longer and grab it. Even if we don’t make it, Battle of Dazar’alor has been a solid campaign for WW – barring Opulence and Blockade we never surpassed the 100 attempt mark on any boss – and you’ve all done an amazing job thus far, especially given the state of the game.
Now, onto the task at hand. Here’s a few maps you all need to read and understand to familiarize yourselves with Phase 2.
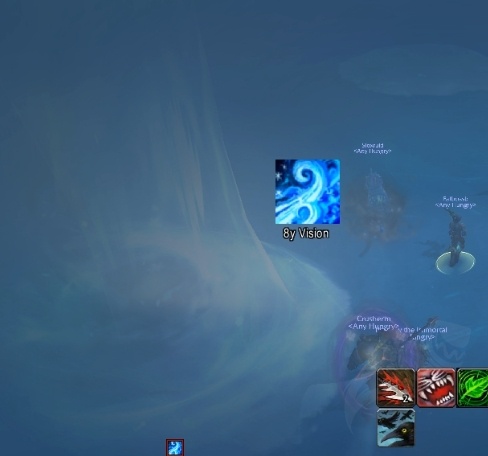
FIRST INTERMISSION
The swords mark the position of each Icebound Image add you need to reach and kill. It is important to stay within 10 yards of eachother at all times in this phase and clean them up ASAP.

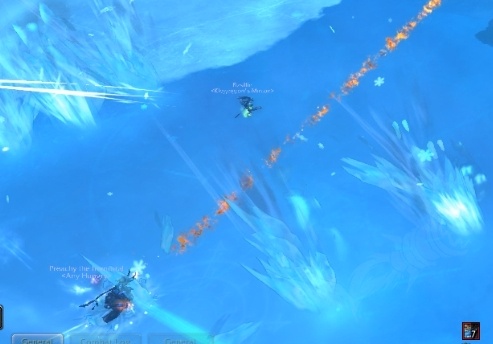
PHASE 2
The map is pretty self-explanatory, so this will be our approach to Phase 2.
- When Intermission is over, stack up at the wall on Blue (Square) to bait Glacial Ray. Once the Ray is done and Avalanche is being channeled, move to Star (Yellow) and kill the 1st Ordnance.
- All 3 Broadside targets run to and drop their debuff on the same Ordnance – which will always be the next one we are moving to.
- Clear your stacks and stay in the barrel till the last second, then move to the wall and bait 2nd Ray. On Avalanche, move to Moon (Silver).
- Repeat the process with the barrel. Bait 3rd Ray and watch for Icefall + Gathering Blizzard 100 energy combo. Siegebreaker Blast runs out at last 3 seconds of debuff and is Life Gripped back into group.
- Once the Blizzard expires, move to Red (Cross) and repeat. Bait last Ray at Blue (Square) and push Jaina to 2nd Intermission.

If there are any questions, feel free to ask them. In any event, see you all this weekend to beat the shit out of Jaina – something we’ve all been dying to do for years and years.
Thanks.
- When Intermission is over, stack up at the wall on Blue (Square) to bait Glacial Ray. Once the Ray is done and Avalanche is being channeled, move to Star (Yellow) and kill the 1st Ordnance.
-
PokoFormer Member@pokoMember since: 21/12/2017
Is there going to be enough time until the first time we clear debuff so we don’t turn into icecubes?
-
ScabbroxWarlord@scabbroxMember since: 05/11/2017
This doesn’t effect that timing Poko, there will be enough time if we move quickly and safely through the intermission and make sure the ordinance gets hit first time.
Getting frozen early means you made mistakes somewhere between not clearing stacks on the ship and getting to Jaina.
-
ScabbroxWarlord@scabbroxMember since: 05/11/2017
The goal right now is clear. We have the time and the resources at our disposal to do it, and this would be our first Cutting Edge since Emerald Nightmare – the only one Weekend Warriors has ever gotten.
100% agree.
Just one slight correction, I don’t think it’s the only CE we achieved, but it is the only one we have achieved since they started taking the CE away in new expansion X.0 pre-patches. We got it in pre-patch generally before then as we were on bosses such as Thok, Mannoroth and Archimonde before the patch. Of course, before SoO pre-patch Mythic CE didn’t even exist.
In EN we were lucky enough to have a very strong team and a very weak end-boss. Cenarius took us longer than Xavius.
Good times, good times.
You must be logged in to reply to this topic.