- This topic has 3 replies, 2 voices, and was last updated 7 years ago by
 Athiyk.
-

STORMWALL BLOCKADE
Primarily single-target fight with a Ranged heavy balance needed to deal with priority adds before they reach the boss. Positional awareness and decent mobility is needed to deal with the encroaching spatial restrictions of the encounter.
- Targets: Brother Joseph, Sister Katherine, Laminaria, Energized Storm, Tempting Siren.
- Played Faction: Horde
Phase 1
The raid will be split evenly into 2 groups, which will each have to encounter and deal with one of the Tidepriests on the Alliance vessels: Brother Joseph or Sister Katherine. Once both Tidepriests are dead, Phase 2 will begin and Laminaria will become attackable. The Tidepriests must die at the same time or they will channel energy into Laminaria.
- Catastrophic Tides: If Laminaria reaches 100 energy, she will channel this ability and wipe the raid after 14 seconds. She also casts this ability at the start of Phase 2, but it can be interrupted.
Brother Joseph
- Sea Storm: Targets random players and summons a blue void zone beneath the targeted players. The zones deal damage and slow movement speed while inside. React quickly and move away from Joseph if you are targeted.
- Sea’s Temptation: Spawns a Siren on either the right or left sides of the ship. The Siren will appear and become attackable, charming and drawing a random player on the ship to approach her and jump off the side to kill themselves. Move away from the Siren as she spawns, and make sure to place Sea Storm zones between you and the add to reduce your speed while drawn to her. If you are not targeted – kill the Siren ASAP.
- Tidal Shroud: Applies an absorption shield on himself and begins channeling energy into Laminaria. Break the shield and interrupt his cast ASAP.
Sister Katherine
- Voltaic Flash: Spawns a set of lightning orbs at a side of the ship that will quickly zap across the deck, dealing damage to anyone in their path.
- Crackling Lightning: Targets a random player with a ticking DOT that will explode for raid-wide damage and silence anyone on the ship. Move away as far away as possible from others to reduce the damage and the silence timer on the rest of your group.
- Electric Shroud: Applies an absorption shield on herself and begins channeling energy into Laminaria. Break the shield and interrupt his cast ASAP.
Phase 2
Laminaria becomes active once both Tidepriests are dead. Use the Teleportation Pad on your ship to transport yourself to the dock again and face the main boss. Get into the stacked positions on your markers and do not interrupt Laminaria until everyone is ready and in position.
- Sea Swell: Will cast and spawn swirlies underneath random players’ feet. Upon impact, will spawn a pile of kelp that deals ticking damage when standing in it. Move together and avoid swirlies, trying to keep them zones stacked to maximize space.

- Ire of the Deep: Spawns a falling orb at a random location with a large blue circle. The orb must be soaked by 2-3 people
before it hits the ground. If it is not soaked, it will drop Sea Swell zones onto random players and deal raid-wide damage.
- Kelp-Wrapped Fist: Every melee hit onto the active tank will apply this DoT. This effects stacks up to 5 times and will reduce movement speed by 2% per stack. Once dispelled, it will apply a damage taken debuff to any nearby targets (including friendly players and the add). The tanks must swap at the max stacks – 5 – and run to the add, call for a dispell to apply the debuff to it to slow it and increase damage onto it. Keep the stacks active onto the add by swapping at 2 whenever there is one up.
- Storm’s Wail: Applies this debuff to a random Ranged/Healer player. With this debuff, the player has 13 seconds to run and clear as much as kelp away from the encounter floor as possible before an add spawns. Once the debuff expires, an Energized Storm add will spawn at their location.

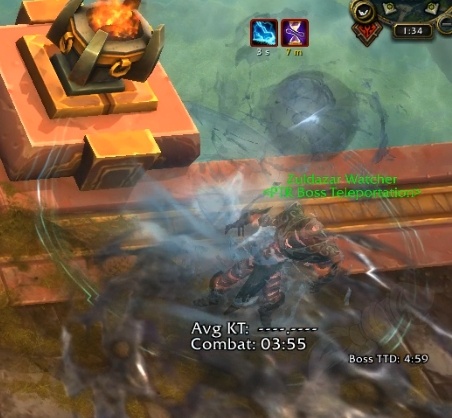
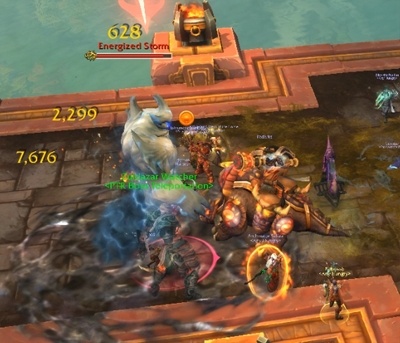
- Energized Storm: Cannot be rooted, stunned or knocked back, but can be slowed. This add is not tankable and it will fixate and move towards the boss. If it reaches the boss, it begins channeling energy into it. All ranged must switch to this add and burn it ASAP, using any possible slows. If it comes into melee range, melee must also switch to burn it.
-
HEROIC DIFFICULTY
Phase 1
- Translocate: At 50% health, the Tidepriest (either Brother Joseph or Sister Katherine) will teleport to the opposite ship. It is very important both bosses hit 50% at the same time, or 1 group will have to deal with 2 bosses. This mechanic forces both groups to learn and deal with the mechanic of each Tidepriest.
Phase 2
- New Ability – Energized Remnant: Upon death, the Energized Storm add will drop an orb at its corpse that will pulse for constant raid-wide damage until it is picked up. Upon picking up this Remnant, the player will gain Storm’s Wail.
- Storm’s Wail: With this debuff, the player has 13 seconds to run and clear as much as kelp away from the encounter floor as possible before an add spawns. Once the debuff expires, an Energized Storm add will spawn at their location.
MYTHIC DIFFICULTY
Phase 1
- New Add – Spawn of Laminaria: This add will spawn onto the sides of either ship and cast Sea Swell, just like Laminaria would in Phase 2. It is very important to place the Sea Swell zones out of the way as there is no way to clear them from the ship area.
Phase 2
- The Souls of Sister Katherine and Brother Joseph will persist throughout the encounter and assist Laminaria.
- New Functionality – Sea Swell: Zones spawned by Sea Swell & Ire of the Deep will now clear stacks of Kelp-Wrapping applied onto the Energized Storm add, making it harder to keep damage debuff and slow onto them.
- New Functionality – Ire of the Deep: All players hit by the orb will be knocked back. The knockback is reduced the more players soak the ability. Tanks & immunities will be used to solo soak any orbs. Do not get knocked off the docks.
-
While we did down the boss on our recent clear I wonder if we can perhaps incorporate a few modifications shown on the heroic video, not only because it would make our next clear smoother, but also to have a basic understanding down on stacking and space management when we eventually delve into mythic.
In the Stankie video BL was used at the start of phase 2, which in my opinion is not a must but it might help us avoid getting to the point of having three adds up. Another great time where BL can be utilizer perhaps is when the first add spawns, which helps with the healing and allows for more orb pulse stacks to go through, maximizing DPS uptime on the boss.
Regardless of when we use BL we should give a try in letting the orb pulse a good 5-10 times. The healing team then can make judgement in how many stacks we are comfortable with. The less time we have to focus on the adds the more damage we can push into the boss itself. Obviously after we have two adds we have to pick up the orbs sooner.
This of course means that we should aim to use the stacking tactic shown on the video. The boss has a big hitbox, allowing the melee to stand further back. Basically we’d create two horizontal ‘lines’ with the sea swells. It both minimizes movement and saves more space, but it is also more dangerous if players move a little too early.
You must be logged in to reply to this topic.


