
- This topic has 7 replies, 4 voices, and was last updated 6 years, 11 months ago by
 Razael.
-
 RagùneraxeWarlord@necroaxeMember since: 25/11/2017


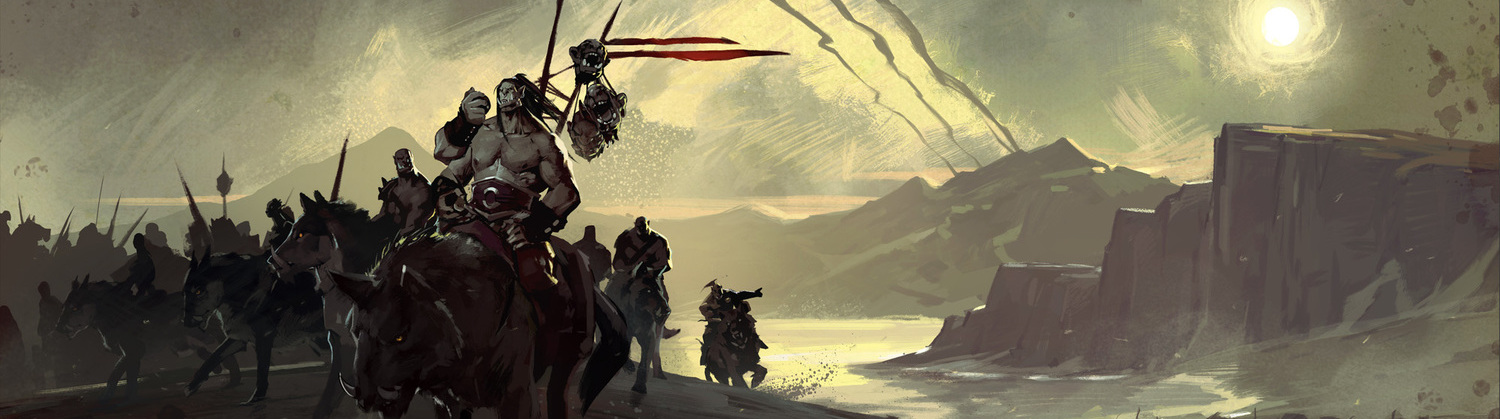
CONCLAVE OF THE CHOSEN
Rotating Council fight with 2 active bosses at a time. Starts with 2 and killing 1 Aspect spawns the next in the list, empowering the surviving Aspect and healing them to full each time. Each Aspect that dies leaves behind a repeating echo of their special ability.
- Targets: Pa’ku’s Aspect, Gonk’s Aspect, Akunda’s Aspect, Kimbul’s Aspect, Ravenous Stalker.
- Played Faction: Alliance.
The fight does not consist of any phases, it just a series of different bosses whose abilities overlap and compliment eachother. You must learn the abilities and how the counteract them, while focusing on downing the bosses at the appropriate time to not cause nasty overlaps.
- Loa’s Pact: Any Aspect within 7 yards of each other take 90% reduced damage and deal 75% increased damage. Cannot stack the bosses at any point.
- Loa’s Wrath: Anytime an Aspect dies, they will buff the opposite, surviving Aspect, healing them to full health and granting them a 15% damage increase buff. This effect stacks.
Pa’ku’s Aspect
- Gift of Wind: 45% haste and 75% movement speed increases to a random boss, including herself. Must be dispelled – if you have Mages, let them Spellsteal.
- Hastening Winds: Stacking buff on the boss with each melee swing, increasing attack speed. Melee will need to taunt and off-tank 1 melee hit to reset stacks.
- Pa’ku’s Wrath: This spell is the Aspect’s Special, and will periodically be cast even after the Aspect has died. Flying dino flies to a random point around the edges of the circle, casting a raid-wide hostile AoE and spawning a safe-zone from the storm beneath her. All stop what you are doing and run underneath the dino for safety.
Gonk’s Aspect
- Crawling Hex: AoE Polymorph effect on a random player. Move away from others with this and call for dispell from Healers when you are safe to avoid Polymorphing anyone inside the zone.
- Wild Maul: Turns into a Raptor and does a nasty frontal 90 degree cone ability for 4 seconds. Avoid it or be mauled.
- Gonk’s Wrath: This spell is the Aspect’s Special, and will periodically be cast even after the Aspect has died. Gonk will spawn Raptor adds that fixate on random people. Raptors must be NUKED and kited.
Kimbul’s Aspect
- Lacerating Claws: Frontal cleave that applies stacking bleed on active for 45 seconds.
- Kimbul’s Wrath: Kimbul the Tiger Loa will appear and leap to random targeted players and pounce them, leaving permanent bleed DoT on them and cleaving anyone in a 5 yard radius. Move out with this if you are targeted and spread away from others.
Akunda’s Aspect
- Lightning Storm: Channels a lightning zone around her in a 10 yard radius. Move out to avoid.
- Mind Wipe: At 100 energy, will apply this debuff to random raid members which causes them to lose all their spells and abilities for 30 seconds. Must be dispelled ASAP by Healers.
- Akunda’s Wrath: Random players receive a debuff that causes them to detonate in a 5 yard radius around them after 6 seconds and spawn Static Orbs from their position outwards. Spread out and move away to walls with this.
- Static Orbs: Hostile lightning orbs that soar through the room, inflicting Nature damage to any target hit and stunning them for 2 seconds. Avoid these.
-
RagùneraxeWarlord@necroaxeMember since: 25/11/2017
HEROIC CHANGES
- New Ability – Cry of the Fallen: Whenever an Aspect dies, they let loose a death wail, leaving a 6 second Nature damage DoT on the entire raid that ticks every 0.5 seconds. Prepare CDs and defensives for this if needed.
- New Loa – Krag’wa: The Frog Loa is present throughout the entire encounter. He is not attackable and untargetable, and possesses no Aspect of his own. Instead, the Frog Loa will periodically cast Krag’wa’s Wrath.
- Krag’wa’s Wrath: The Frog will leap to the furthest player from his current location and crash onto the ground, dealing damage and knocking back anyone on the impact point. Will need to be baited away from key mechanics by Ranged.
- New Ability – Pack Hunter: Whenever Ravenous Stalker (Raptor adds from Gonk’s Wrath) get too close to eachother, they gain this buff that grants them 75% increased move speed and CC immunity for 5 seconds. Keep the adds separated at ALL TIMES when kiting.
MYTHIC CHANGES
- New Loa – Bwonsamdi: Bwonsamdi is unattackable and untargetable, much like Krag’wa. He possesses no Aspect of his own but casts Bwonsamdi’s Wrath periodically onto random players.
- Bwonsamdi’s Wrath: Targets of this Curse debuff will become immune to all healing. If they die with this debuff, it will jump to the next closest person with out it. Must be dispelled ASAP by any class/spec that can removes Curses.
-
RagùneraxeWarlord@necroaxeMember since: 25/11/2017
NORMAL / HEROIC GUIDES
MYTHIC GUIDE
-
RagùneraxeWarlord@necroaxeMember since: 25/11/2017
Bumping this as it will be our next target after Opulence.
-
 ScabbroxWarlord@scabbroxMember since: 05/11/2017


Bumping again. Be disappointed if we’re not on this today.
-
 AthiykCouncil Member@bluedragondrgnyahoo-comMember since: 03/05/2018


I checked a few videos about timings and interesting tidbits to keep in mind with this boss encounter.
- Both Stankie and Fatboss recommends to kill Gonk either at the same time or right when Pa’ku spawns at the middle of the room. This is done to avoid some nasty overlaps in the future.
- After the first Pa’ku’s wrath both recommend to kill Kimbul first, because the tank damage is very high while he is up. Stankie recommended using Bloodlust here, though the timing of Fatboss might be more benefitial for us (they recommend BL to be used at 3:45 minutes into the fight, midway during a Pa’ku’s Wrath both to make sure that our next target is dead before the next Pa’ku’s Wrath and because this Pa’ku’s Wrath will have overlaps. It is also more benefitial for those specs that have 2 minute cooldowns to use.
- So far the two boss kill path I have seen is: Gonk>Kimbul>Pa’ku>Akunda and Gonk>Kimbul>Akunda>Pa’ku. With the first setup we will have to watch out for Thundering Storm cast of Akunda since it can overlap with Pa’ku’s Wrath which will end up killing us. The second path negates this option and then we only have purges to worry about (tanks can swap on CD to avoid being obliterated by Pa’ku’s aspect.)
- Stankie’s video did not mention it, but the safety circle underneath Pa’ku is smaller now, much smaller. Akunda’s Thundering storm is a few yard bigger than it, so it is really important we do not have the boss in the circle when she casts it.
- Either way it will be important to dispell Pa’ku’s haste buff from the raptors.
When we set up the group composition for this boss we need to keep in mind that we will have 5 healers, but only Shamans and Druids can dispell curse effects. We will need some of our DPS to coordinate with the healers when it comes to dispells at the later stages of the fight.
-
RagùneraxeWarlord@necroaxeMember since: 25/11/2017
In light of last week’s progression on this boss, the Council convened yesterday to discuss changes, different approaches and improvements we can make to better guarantee killing this boss this weekend.
Boss Kill Order
We’ve discussed the different possibilities of kill orders, and whilst we agree that leaving Pa’ku till last will resort in a much simpler final phase for the encounter, we also found merit in killing Pa’ku 3rd instead of Akunda for the following reasons:
- With as many buffs as he gets by remaining alive all fight, Pa’ku absolutely demolishes tanks and soaks up a fair bit of mana to keep tanks healthy. Couple this with the need to frequently tank swap Pa’ku due to his stacking attack speed buff on a fight which punishes boss movement didn’t make our tries any easier.
- With Pa’ku down and out, we will eliminate the risk of Raptors gaining Gift of Wind from the boss. We found that Pa’ku’s Gift of Wind if left undispelled allowed the Raptors to run 75% faster and also grant them 45% Haste, making them double hit their targets and kill them virtually instantly if they reached them. The haste in itself is deadly enough, but we also checked and 75% Move Speed increase is the same amount of speed increase they gain if they cross and buff eachother, and Gift of Wind lasts 15 seconds as opposed to 5 seconds – even if it can be Purged.
With this in mind we will be opting to kill Pa’ku 3rd on our next progression day and see how much difference this truly makes or if the change is negligible.
Raptor Handling
One of the key mechanics that will occur throughout the entire fight and incurred the most deaths on our Progress was Gonk’s Wrath, which spawns the Ravenous Stalker adds which need to be killed ASAP.
The biggest challenge of this mechanic is dealing, kiting and CCing the Raptors in an intelligent way so as to get rid of them as quickly as possible. As such, here are some maps to help instruct you on how you should be kiting them.
Crowd Control
Each of the Raptor’s spawn points will be marked and we will assign specific people to oversee these spawns and CC the raptors that will come out of them.
Your Crowd Control (in this case Stuns and Knockbacks) will need to be used sparingly and strategically and as such will ONLY be used in the following scenarios:
- If the Raptor is about to reach its target.
- If the Raptor is about to overlap with another Raptor.
- If the Raptor is in melee ranged of the active boss. (if knocking back, try to knock them towards a boss and away from their target)
- If the Raptor is about to enter the safe zone during Pa’ku’s Wrath.
No Pa’ku’s Wrath
As you can see in the map below, each Raptor spawn point is marked with Moon, Orange (Circle), Purple (Diamond) and Green (Triangle).
The 2 active bosses are positioned on Blue (Square) and Red (Cross).
The Moon and Orange (Circle) Raptors will be Death Gripped and stunned under the active bosses and killed ASAP.
The Purple (Diamond) and Green (Triangle) Raptors will be dragged towards Skull by their targets and be forced into the Monk’s Ring of Peace (the white circle) and be killed after the Moon and Orange (Circle) Raptors.
IF the final 2 raptors survive through the Ring of Peace, the fixated players must drag them into boss melee range to make sure they die off shortly after.

During Pa’ku’s Wrath
Later in the fight, Pa’ku’s Wrath and Gonk’s Wrath will overlap. We saw this on our tries that it happens pretty much from the 2nd-3rd Pa’ku’s Wrath and onwards.
Dealing with the Raptors during this deadly mechanic is even more crucial to surviving the mechanic with everyone alive and well, but killing them before the winds is over is quite challenging given the need to survive.
In this position, ranged players will focus their efforts on killing the Moon and Green (Triangle) Raptors as soon as they are in range from the safe zone and behind the Rings of Peace. (keep in mind, Pa’ku’s Wrath positioning is entirely random, the raptors that will need to be killed are just the ones that will spawn closest to our safe zone)
Fixated targets will need to stand on Skull to force the Raptors to collapse onto the Rings of Peace.
A 3rd Ring of Peace (if available) will be used on the 2 further Raptors to block them from approaching us.
Once Pa’ku’s Wrath is over, Melee will join the Ranged in finishing off the closest Raptors and the 2 furthest will be stunned. Once the first 2 are dead, leave the last 2 towards the center and kill them while they are stacked on each boss.

Bwonsamdi’s Wrath and Decursing
After our progress last week, we found weaknesses in the previously established strategy to have each decurser assigned to a specific group.
Each decurser will now be responsible for the entire raid again and will be encouraged to up their dispell count whenever it is necessary to do so, for example:
- Decursing Tanks is always a top priority before protecting your own children.
- Decursing players close to death.
- Decursing players on 50% health during Pa’ku’s Wrath.
- Avoid decursing players with strong defensives or immunities that can survive Pa’ku’s Wrath even without healing (e.g. Rogues with Cloak of Shadows, Paladins with Divine Shield etc)
I hope everyone of our raiders take this information on board and reads it thoroughly before our raids this weekend so we can go in and one-shot these bastards with this new (hopefully better) approach to the fight.
If you have any questions, feel free to approach your Role Leaders or any person on the Raid Council, including myself.
Thanks for reading and see you tomorrow for raid!
-
RazaelFormer Member@sarandielMember since: 17/02/2018
110% behind these changes. I know that from experience, after we stopped stunning the raptors as soon as they spawned, several of us melee began stunning them as soon as they came into boss melee range, and they simply melted away in seconds. The above tactic takes full advantage of that and I think it will work wonders.
If you want to find the secrets of the universe, think in terms of energy, frequency and vibration. - Nikola Tesla
You must be logged in to reply to this topic.